Peptide Storage
Peptides are fragile and need stable storage to preserve quality and shelf life. When you have several vials, mix only the vial currently being used.
Factors Affecting Stability
- -Temperature fluctuations: higher heat can speed up degradation.
- -Freeze/thaw cycles: repeated cycling can quickly reduce efficacy.
- -Humidity: moisture may cause degradation or crystal formation.
- -Light exposure: strong light can lower peptide quality.
- -Mechanical shock: dropped vials can lose quality.
Storage Preparation
- Get an opaque container
Use a tightly sealed container. If it is clear, wrap the vials in foil.
- Add desiccant packets
Silica packets help reduce moisture exposure during storage.
- Seal and store properly
Choose fridge or freezer storage based on the recommended duration.
Storage Duration
| State | Storage | Duration |
|---|---|---|
| Reconstituted | Fridge | 60-90 days |
| NAD+, AOD-9604 | Fridge | 30-45 days |
| Lyophilized | Room temp | 30-60 days |
| Lyophilized | Fridge | Up to 1 year |
| Lyophilized | Freezer | 2-3 years |
Supplies Needed
Required
- ✓Alcohol prep pads
- ✓Bacteriostatic water or the solvent specified for the peptide.
- ✓Clean insulin syringes - .3 mL for single-unit doses.
Optional
- 22-23 gauge, 3 mL syringe for reconstitution.
- Storage container - light-blocking and moisture-proof.
Syringes
Syringe Anatomy
- -Tip: needle end.
- -Barrel: numbered cylinder.
- -Plunger: moving inner part.
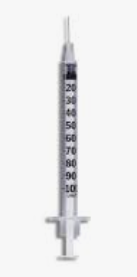
1 mL / 100-unit
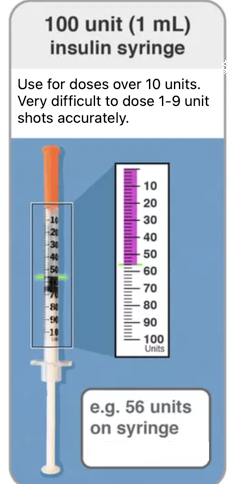
For doses over 10 units.
- -Each tick equals 2 units.
- -Single-unit measuring is not accurate on this syringe.
0.3 mL / 30-unit
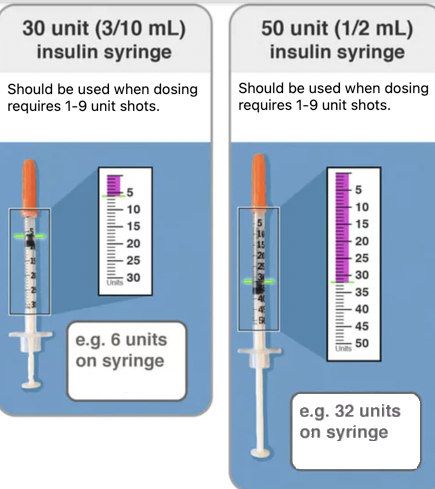
For single-unit doses such as 2, 5, or 7 units.
- -Each tick equals 1 unit.
- -Best option for small unit precision.
3 mL Reconstitution
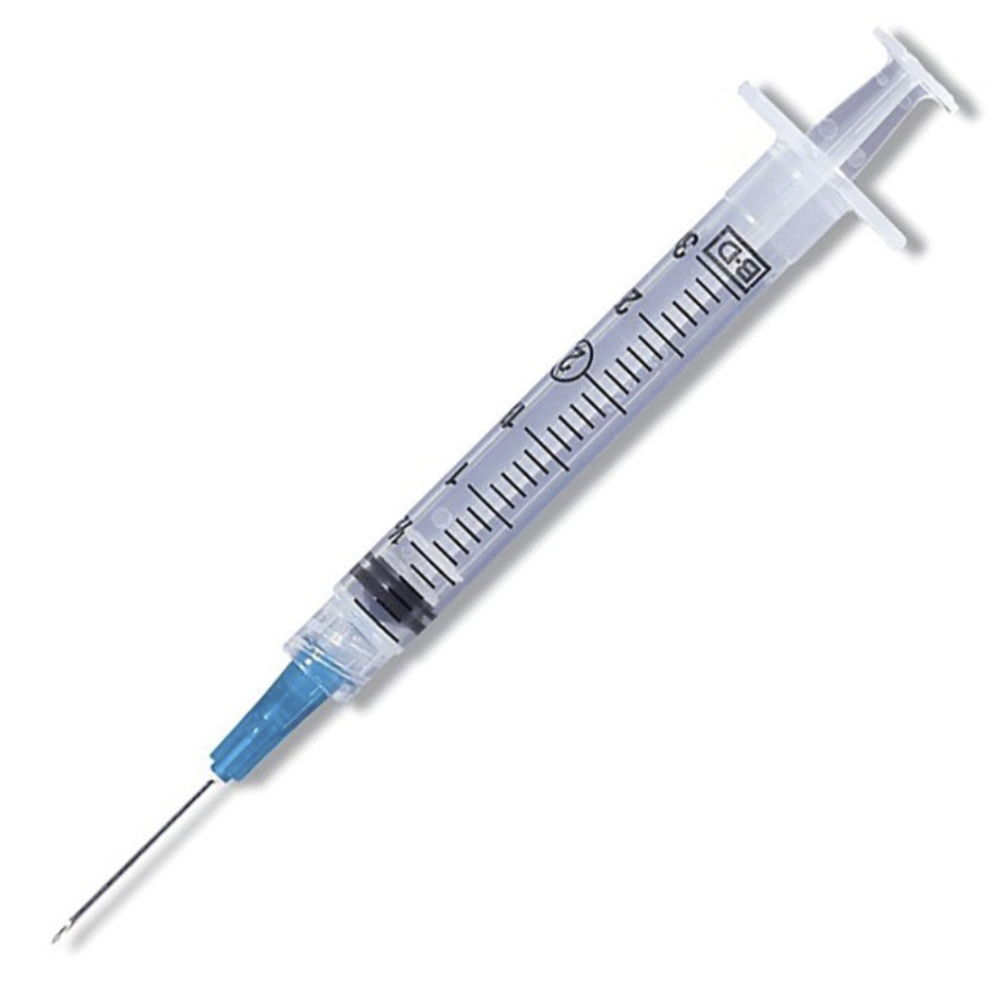
For accurate reconstitution.
- -Short lines show 0.1 mL increments.
Luer Lock 10 mL
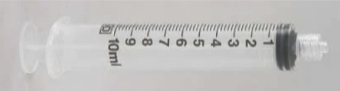
For Lemon Bottle or large-volume preparation.
- -Needle may be sold separately.
Needle Gauge
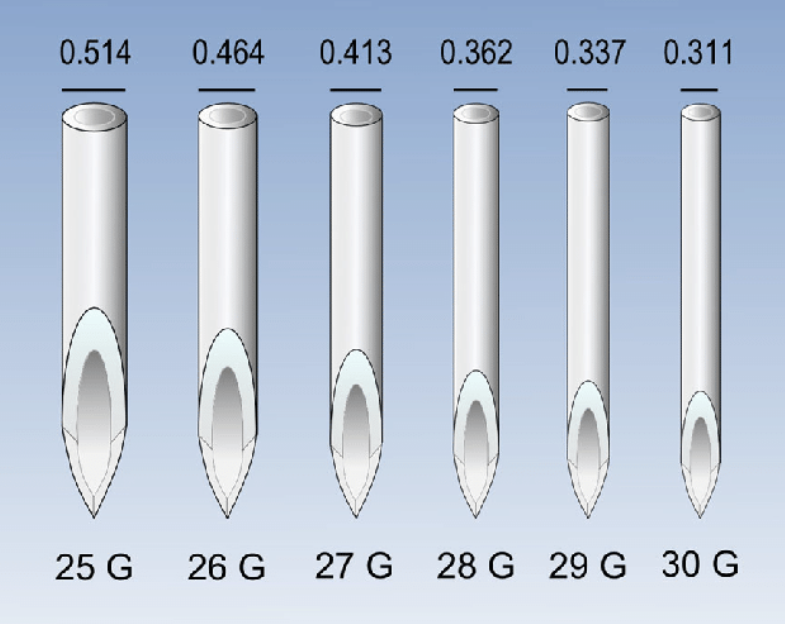
Higher gauge numbers mean thinner needles.
- -Dosing: 29-31 gauge.
- -Reconstitution: 27 gauge.
Needle Lengths
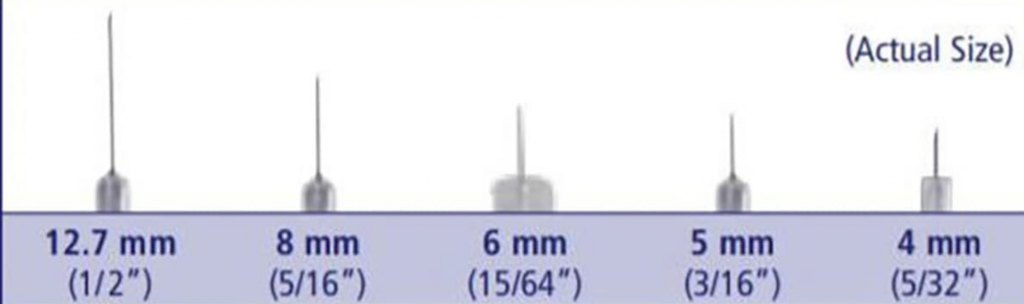
- -Subcutaneous: 5/16" (8 mm) or 1/2" (12 mm).
- -Intramuscular: 1/2" (12 mm) recommended.
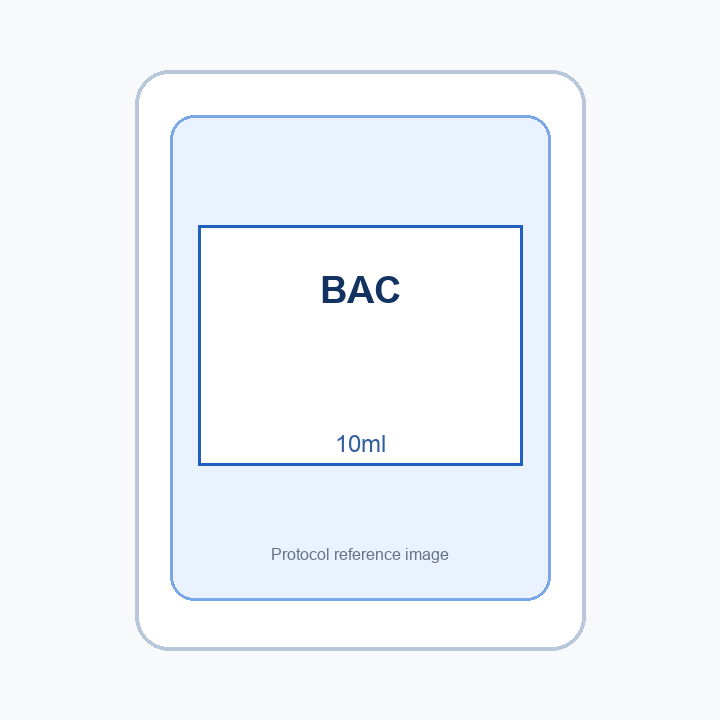
Reconstitution
Step-by-Step Process
- Remove caps & clean
Clean the BAC water and peptide vial tops with alcohol pads.
- Select needle
A 22-23G 3 mL syringe is preferred; a 28-29G insulin syringe can also be used.
- Draw the water
Insert into the BAC water vial, invert, and draw the indicated amount.
- Inject slowly
Insert into the peptide vial and press the plunger slowly and gently.
- Remove & dispose
Cap the syringe and dispose of it properly.
- Mix gently
Gently roll in your palms, then allow 15-30 minutes for it to dissolve.
Subcutaneous Injection
Injection Steps
- Clean vial & draw dose
Use an alcohol pad, invert the vial, and draw the indicated amount.
- Prepare site
Clean the selected skin area with an alcohol pad.
- Pinch & inject
Pinch fatty tissue, lift it away from the body, and insert the needle fully with a quick motion.
- Depress plunger
Inject the full contents and wait a few seconds before removing.
- Post-injection
Massage the area for about 1 minute through clothing, then put the peptide back in the fridge.
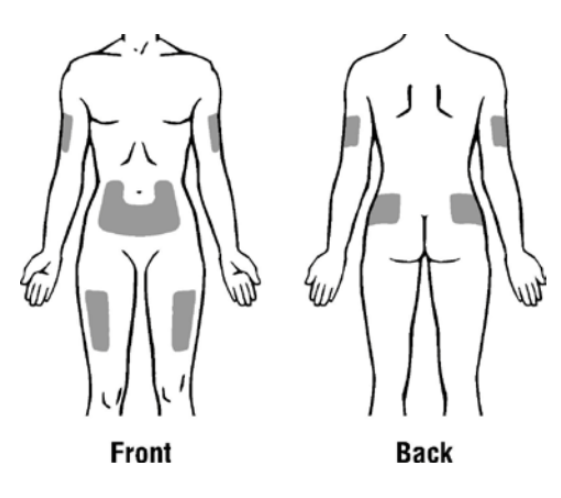
Best Injection Sites
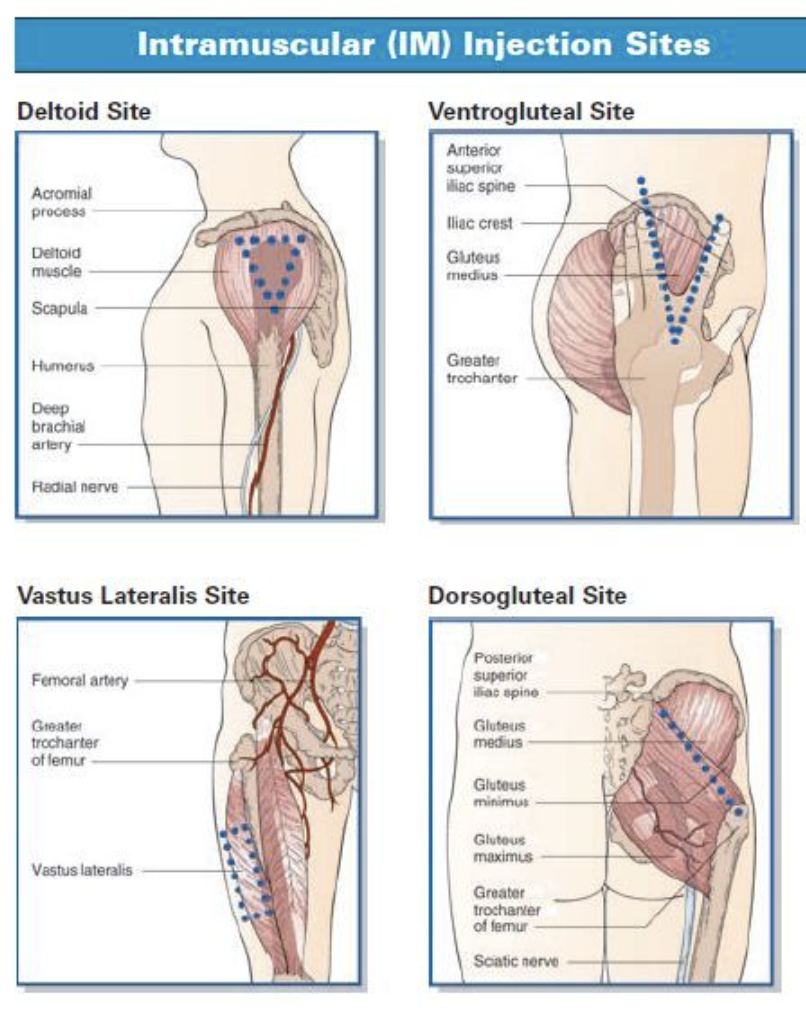
Intramuscular Injection
Injection Steps
- Clean & draw
Clean the vial top and draw the indicated dose from the inverted vial.
- Prepare site
Clean the selected skin area with an alcohol pad.
- Inject into muscle
Advance the syringe quickly through the skin and into muscle.
- Complete injection
Depress fully and wait a few seconds before removing.
- Post-injection
Massage the area for about 1 minute, then put the peptide back in the fridge.
Best Injection Sites